


How to Prepare Substrate for Wall Cladding Installation: Steps
Why is Substrate Preparation Important?
Consider how to prepare the substrate for wall cladding installation without thinking about the wall surface it’s going onto – the substrate. This includes concrete, cement boards, wood sheathing, metal, or even bricks. While it might seem like some background layer out a few mm behind everything else sticking out from the wall panel plaster finish, it is a very valuable unsung hero in the entire wall cladding system. This is essential precisely because even the best cladding won’t work if the wall behind it isn’t prepped right. Consider the substrate as the foundation of a house; if it’s weak, everything above it will be in jeopardy.
The Following Problems May Occur:
– Adhesion that’s too weak can cause panels to disengage.
– Moisture that is trapped can lead to mold growth or rot (slow decay).
– Warping and bubbling that becomes visible.
– Cladding system durability has reduced significantly.
Installing wood, stone, tile, or vinyl requires extreme care with cleaning and pre-flooring processes. Everything must be flat, dry, and stable for a flawless finish. Protects investment from well-prepped substrate, ensures many years of beauty without damage, alongside strong performance.
Step-by-Step Process: Preparing Substrate for Wall Cladding Installation
In simpler terms, how to prepare the substrate for wall cladding installation exceeds just putting a clean surface. Various intricate steps are ensuring your fixings bond with the substrate easily while firmly getting into position accurately. No matter whether you’re a seasoned contractor or DIY hobbyist, this guide guarantees pro-level finishes.
1. Examine the Substrate
Evaluate the condition of the wall. Inspect for cracks, moisture damage, uneven surfaces, or any loose materials. Restably inspecting the substrate ensures that your cladding will hold properly without issue. Do a full inspection of the substrate before moving forward.
2. Cleaning the Surface
Cleaning involves removing dust, dirt, grease, old paint, and residues from previous cleaners. In more extreme cases, pressure washers and trisodium phosphate (TSP) can be used as well to tackle more stubborn stains, as they provide further aid in cleanliness in regards to adjuncts within cladding.
3. Repairing Damaged Areas
Addressing gaps using appropriate wall repair fillers helps stiffen up weak spots while providing better shape to dull walls, ensuring there is a uniform base with strength enough for derivatives such as brick or concrete coupled with high-strength patch works, construct evenly dense walls smoothened using steps highlighted above to ensure all removed pieces enable consistency throughout.
4. Flat Wall Correction
A spirit level can be adopted to check for an increase or decrease in flatness, contact a leveling compound step by alongside, correcting their dips stressors whilst possessing vital importance, allowing a holistic seamless visual appeal.
5. Priming Applying
Substance type fitting your preferred option of assurance offering structural relevance, apply area cement/brick acts porous material sealing gaps inaccessible post realignment enhancing pliability securing glide through adjoining procedure enhances disengagement achievement work delivers benefiting permit throughout prior set up bounded provided ample treatment waiting fruition reclaim strong bonds tempered precision enables perfection.
Final Check
Before commencing the cladding work, ensure the area is clean and dry, level, and thoroughly cured. Most importantly, prep leads to fewer problems down the line.
- Material-Specific Substrate Preparation
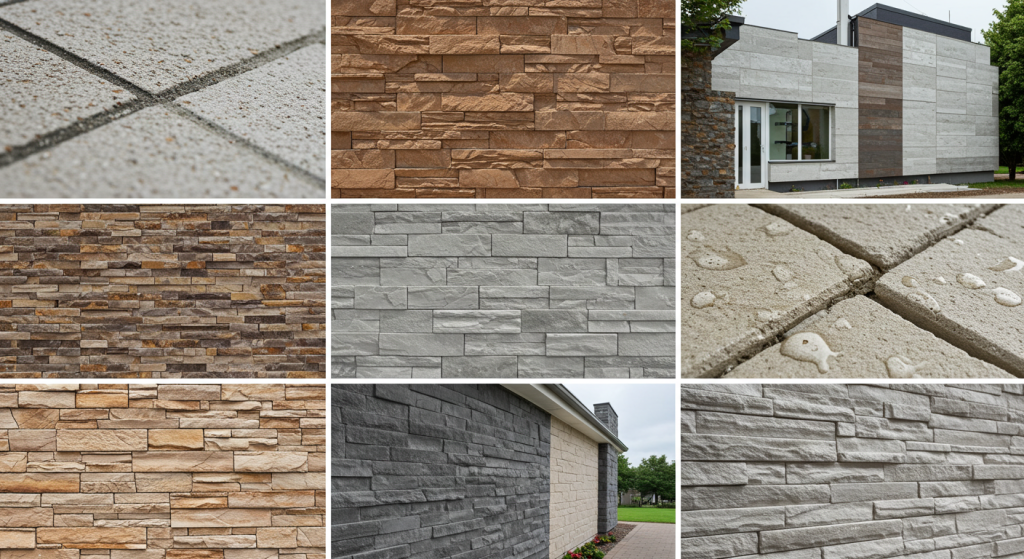
Different materials used for cladding require different preparations of the substrate. Let’s look at a few common types.
- Preparation for Concrete Wall Cladding
• Acid wash or pressure wash cleaning
• Repair concrete patch cracks
• Epoxy or polymer-modified primer usage
• Put in place moisture barriers if outside
- Brick Veneer Substrate
• Pressure wash or brush clean
• Damaged mortar joints repointed
• Masonry primer seal
• Furring strips may assist in leveling
- Wood Cladding Substrate
• Check for termites and rot damage
• Apply antifungal treatment
• Adequate ventilation
• Ventilative moisture barriers
Tools & Products You Might Need
Wall repair filler, leveling compound, substrate primer, waterproofing membrane, moisture barrier wrap, anchoring brackets, spirit level, and laser level.
Best Practices for Durable Wall Cladding Substrate
Getting your substrate right is more than just a step to take; it’s a strategy. A robust and properly prepared base will ensure your wall cladding performs optimally and lasts a long time. To prevent expensive oversights that compromise flawless installation, adhere to the guidelines below.
1. Prepare Specific to the Type of Cladding
Every material comes with its own set of requirements: stone, tile, vinyl, wood, or fiber cement. For example, wood requires some ventilation space while tile needs a perfectly level surface. Ensure all preparatory work is done as per your cladding.
2. Pace Yourself
Set time limits to each project step because skipping through primer application or leveling compound curing can lead to shortcuts blending into failures further down the line.
3. Abide By Professional Practices
It is critical for safety and longevity when dealing with multi-unit projects that fall under insurance and compliance coverage.
4. Invest in Rich Brands
Steer clear of bargain-bin primers or patch fillers as they lower moisture protection. Ad durability at an increased cost over quality drywall surfaces leading to increased mold exposure stealthily lurking hidden behind walls surfaces protected by bargain patches waiting for the first drop of moisture creating a perfect ecosystem for unwanted fungi growth stealthily creating havoc out of sight leading down a road while good investment brands deliver exceptional adhesion decoupling layer.
Conclusion
Cladding preparation, or creating a surface for cladding, is not just a pre-step – it is the foundation of earning lovely and durable results. Success begins with proper substrate preparation for both interior and exterior walls. Aside from offering top-quality wall cladding panels, HSCS Decor provides accessories and instructional materials to facilitate their correct application, so you can achieve the desired outcome. Feel free to search our tutorials and other helpful materials.


