


How to Install PVC Wall Panels for Home Renovation
Learning how to install PVC wall panels for a home renovation is one of the fastest ways to completely transform a room. This material is a game-changer for DIYers. It's lightweight, 100% waterproof, and, best of all, incredibly forgiving. You can get a professional-looking, grout-free finish in a single weekend.
Unlike tiling, which is a wet, messy, and multi-day process, PVC panels are a "dry" install. They cover old, ugly walls and give you a clean, modern look almost instantly.
I've installed these panels in basements, bathrooms, and laundry rooms. I've made the common mistakes so you do not have to. This complete guide walks you through every step, from preparing your wall to cutting your first panel and adding the final, perfect trim.
What Are PVC Wall Panels?
PVC wall panels are durable, decorative sheets made from 100% Polyvinyl Chloride plastic. They are typically lightweight and have a hollow core. They are designed to lock together with a tongue-and-groove system, creating a waterproof and easy-to-clean surface.
Their design is their main benefit. They are an engineered solution to the biggest problems in home renovation: moisture, mold, and long project times. For a full background, you can read our complete guide, PVC Wall Panels Explained.
Why Choose PVC Panels for a Home Renovation?
The top reasons are speed, simplicity, and water resistance. PVC panels are 100% waterproof, making them ideal for wet areas like bathrooms. They are also grout-free, so there is no scrubbing mold. The installation is fast, requires no special skills, and is very DIY-friendly.
Let's look at the main advantages for a renovation:
- 100% Waterproof: This is the biggest one. They are made of plastic. Water cannot harm them. This makes them a top choice for shower enclosures, bathroom walls, and damp basements.
- No More Grout: This is a huge quality-of-life benefit. Grout is porous. It stains, cracks, and grows mold. PVC panels have a smooth surface that you just wipe clean.
- Speed of Install: A tiled shower can take 3-4 days (waterproofing, mortar, tile, grout, seal). You can install PVC panels in a shower in a few hours.
- Covers Old Surfaces: You can install PVC panels directly over old tile, plaster, or drywall. This saves a massive amount of time on demolition.
Can a Beginner Really Install PVC Panels?
Yes, absolutely. This is one of the most beginner-friendly projects I have ever done. If you can use a tape measure and a caulk gun, you can do this. The panels are very light, so one person can easily handle them.
My first project was a small laundry room. I was nervous about the cuts. But the "score-and-snap" method (more on that below) was so simple. There was no dust, no mess. The panels just clicked together. The satisfaction of finishing a whole wall in an hour is what makes this project so great for beginners.
What Tools and Materials Will I Need?
You do not need a lot of expensive or specialized tools. Most of what you need is probably already in your garage.
Here is a simple checklist.
Essential Tools
- Tape Measure: The most important tool. Measure everything twice.
- Caulk Gun: For applying the adhesive and sealant.
- Level: A 4-foot level is ideal. This is critical for the first panel.
- Utility Knife: A new, sharp blade is key for the "score-and-snap" method.
- Fine-Toothed Saw: (Optional, but helpful). A miter saw, jigsaw, or even a hand saw works for complex cuts or thicker panels.
- Pencil: For marking your cuts.
- Clean Cloths: For wiping away any excess adhesive immediately.
Essential Materials
- PVC Wall Panels: Buy about 10% more than your wall's square footage to account for cuts and mistakes.
- PVC Panel Adhesive: This is not regular construction glue.
- 100% Silicone Sealant: For sealing corners and edges in wet areas (bathrooms, etc.).
- PVC Trim Pieces: You will need these for a professional finish. (Internal corners, external corners, and end caps).
What Kind of Adhesive Do I Need for PVC Panels?
You must use an adhesive that is specifically rated for PVC panels or vinyl. Look for "Solvent-Free" or "Low-VOC" construction adhesive. Using the wrong glue (like a high-solvent glue) can chemically melt or warp the back of the thin plastic panel.
This is a mistake I made once. I used an old tube of "extra-strong" adhesive I had in my truck. The next day, the panel surface was wavy. The chemicals in the glue had distorted the plastic. Use the product the panel manufacturer recommends. It is usually sold right next to the panels.
How Do I Cut PVC Panels? (The Easy Way)
You have two simple methods. The one you choose depends on the panel and your comfort.
Method 1: The Score-and-Snap (My Favorite) This is for standard, hollow-core panels.
- Mark your cut line on the front (finished) side of the panel.
- Place a straight edge (like your level) along the line.
- Press hard and score the panel with your utility knife. You may need 2-3 passes.
- Stand the panel up and "snap" it along the scored line. It will break cleanly. This method is fast, quiet, and creates zero dust.
Method 2: The Saw Cut This is for thicker, structural PVC wall panels or for making complex cuts (like around pipes).
- Mark your line on the back of the panel.
- Use a jigsaw, circular saw, or miter saw with a fine-toothed blade (like a plywood blade).
- Cut slowly to avoid chipping the plastic.
How Do I Prepare My Wall for Installation?
The wall must be clean, dry, and reasonably flat. The panels are flexible, but they are not magic. They will follow the contours of your wall. Remove any flaking paint, old wallpaper, or dust.
Can I Install PVC Panels Directly Over Drywall?
Yes. This is the easiest and most common installation. Just make sure the drywall is clean and dry. You can install right over a painted wall. Just give it a quick wipe-down to remove any dust or cobwebs.
Can I Install PVC Panels Over Existing Tile?
Yes, and this is a massive time-saver in a bathroom renovation. As long as the existing tiles are securely fastened to the wall (not loose or falling off), you can install right over them.
- Clean the tiles thoroughly. A product like TSP (Trisodium Phosphate) is great for removing old soap scum and grime.
- Make sure the tile is 100% dry.
- Apply your adhesive directly to the face of the tile. The panels will stick perfectly.
What About Uneven Walls or Concrete Block?
If your wall is very uneven (bows, waves) or is a porous material like concrete block, you should not glue the panels directly. You must first install furring strips.
- Furring strips are thin pieces of wood (like 1x3s) or metal.
- Attach these strips vertically to the wall, 16-24 inches apart.
- Use a level and shims to make this new wood "frame" perfectly flat and plumb (vertically level).
- You then attach the PVC panels to these strips (using adhesive and/or staples). This method is more work, but it is the correct way to handle a bad wall. It also creates a small air gap, which is good for airflow in basements.
The Step-by-Step Guide: How to Install PVC Wall Panels
Here is the complete process. Read all the steps before you start.
Step 1: Measure and Plan Your Layout
Before you cut a single panel, plan your wall.
- Acclimatize: Let your panels sit in the room for 24-48 hours. This lets them adjust to the temperature and humidity, preventing future warping.
- Measure: Measure the height of your wall in a few places. Walls are rarely perfect.
- Plan Your Start: You will start in one corner.
- Plan Your End: Measure the total width of the wall. Divide it by the width of one panel. This tells you what size your last piece will be. If it is a tiny, 1-inch sliver, you should "center" the layout. To do this, cut your first panel in half so you end up with two equal, medium-sized panels on both ends. This looks more professional.
Step 2: Cut Your Panels
Cut your first panel to the correct height. Remember the "score-and-snap" method. If you have light switches or outlets:
- Measure exactly where the outlet box is on the wall.
- Transfer these measurements to your panel.
- Drill a small hole inside each corner of your marked-out box.
- Use your utility knife to cut from hole to hole, like a "connect-the-dots." The box will pop right out.
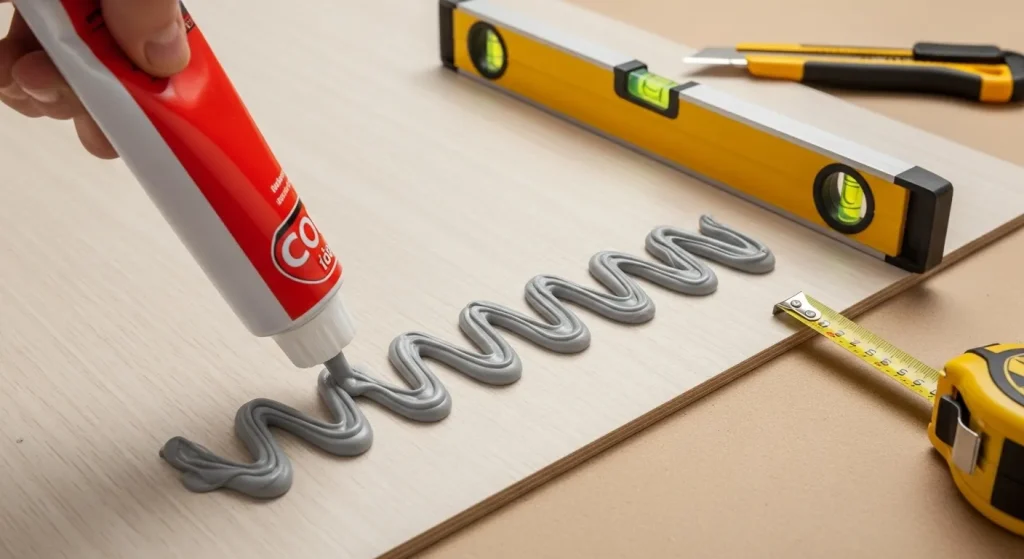
Step 3: Apply Adhesive
Take your first cut panel. Lay it face-down on a clean surface.
- Load your caulk gun with the PVC panel adhesive.
- Apply a generous bead in a large "S" or "X" pattern on the back.
- Apply a full bead around the entire perimeter, about 1-2 cm (a half-inch) from the edge. This ensures the edges are sealed tight.
- Tip: Do not put the glue too close to the edge. When you press the panel to the wall, the glue will squeeze out and make a mess.
Step 4: Install the First Panel (The Most Critical Step)
This panel must be perfectly, 100% plumb (vertically level). Do not trust your wall's corner. Most corners are not perfectly straight.
- Take your first panel (with the glue on it).
- Press it into the corner.
- Place your level on the outer edge of the panel.
- Adjust the panel until the bubble on your level is perfectly in the middle.
- Once it is level, press the panel firmly against the wall. Rub the entire surface with your hands to make sure the adhesive makes good contact.
he first time I did this, I just jammed the panel into the corner and kept going. By the time I got to the third panel, I had a 1cm gap at the top. The "lean" gets worse with every panel. I had to pull all three off, which was a sticky mess. Always trust your level, not your wall.
Step 5: Install the Remaining Panels
This is the fast, fun part.
- Cut your next panel.
- Apply your adhesive.
- This panel will have a "tongue" (a small lip) and a "groove" (a channel).
- Insert the tongue of your new panel into the groove of the panel already on the wall. It should lock in.
- Press the panel flat against the wall.
- Wipe away any adhesive that squeezes out immediately with a clean cloth. Dried adhesive is very hard to remove.
- Repeat this process across the wall.
Step 6: Install the PVC Trim (The Finishing Touch)
Your walls are covered, but you have ugly cut edges in the corners and at the end. Trim is what makes it look professional.
- Internal Corner Trim: This is a flexible "L" shape. You put adhesive on it and press it into the corner. It covers the gap where the two walls meet.
- External Corner Trim: For the outside corners.
- End Cap (J-Trim): This is for the edge of the last panel (e.g., by a door frame). It gives it a clean, finished edge. Cut your trim to length, apply a small bead of adhesive, and pop it into place.
What Are Common Mistakes to Avoid?
I have made most of these. Please learn from me.
- Mistake 1: Not Leveling the First Panel. (I've said it three times because it's that important).
- Mistake 2: Using the Wrong Adhesive. (It will melt the panels or they will fall off).
- Mistake 3: Not Sealing in Wet Areas. In a bathroom, you must run a bead of 100% silicone in the corners and where the panel meets the shower tray or tub. This is your final waterproof seal.
- Mistake 4: Not Planning Your Layout. Ending on a 1-inch sliver of a panel looks terrible. Plan your start and end.
- Mistake 5: Not Leaving a Small Gap. At the top (ceiling) and bottom (floor), leave a tiny 2-3mm gap. This "expansion gap" lets the panels move with temperature changes and prevents buckling. Your trim will cover this gap.
How Does This Compare to WPC Installation?
The process is very similar, but WPC panels are different. WPC is a dense, solid composite of wood and plastic.
- WPC is heavy. You need a high-grab adhesive.
- You MUST use a saw. You cannot "score-and-snap" WPC.
- The feel is more like installing wood. You can read a full comparison in our PVC vs. WPC wall panels guide.
What About Different PVC Panel Types?
The method above is for standard panels. But there are others.
- Structural PVC Wall Panels: These are much thicker and heavier. They are always installed on furring strips, not glued to the wall.
- Paintable PVC Wall Panels: These are installed the same way, but your last step is to prime and paint them.
A Note on Sustainability
It is good to ask about the environmental impact. PVC is a plastic, but it has a long, useful life. A wall that lasts 30+ years without mold or replacement is a durable good. Many panels are also 100% recyclable. For more, see our thoughts on sustainable PVC wall paneling.
Are You Ready to Install Your PVC Panels?
Installing PVC panels is a fast, clean, and waterproof solution for a home renovation. It is the perfect project for a beginner to get a major, confidence-boosting win.
You are trading a messy, expert-level job (tiling) for a simple, "dry-fit" system. You get a modern, grout-free wall that you can clean and maintain with a simple wipe. By following these steps—especially leveling that first panel—you can achieve a flawless, professional finish in just one weekend.


