


Installing Wall Cladding Panels: A Step-by-Step Guide to Installing (Pro Tips)
One of the quickest methods to make the exterior or interior of a building look better is by cladding the walls which provides a safeguard, can be insulated and has a clean modern look. However, installation quality is very critical to the final result. The following is a how-to installation guide that can be followed either when installing exterior facade boards or interior ornamental covering.The installation should always be done according to the technical requirements of the manufacturer because the processes of installing the Installing Wall Cladding Panels and the requirements of the systems differ among the various panel products.
1) Start With the Right Planning (Don’t Skip This)!
Before you lift a single panel, confirm three things:!
a) Is the base wall where the cladding is being attached to concrete or brick?
Common wall substrates comprise of concrete, brickwork, masonry block walls, structural sheathing, metal stud framing and timber stud construction. Each of them needs various fixings and even another subframe in certain cases.
b) Interior or exterior?
You will also require weather proofing such as breathable membranes, correct flashing, ventilated air space, and fixings not going to corrode over time when attaching cladding outdoors.The inside installations tend to be less complicated and yet require flatness and proper spacing.
c) The form of the panels to be used
The first step is to decide whether or not the panels will be run vertically or horizontally and then decide where all the joints will be located as well as how you will complete corners and returns. A laser level or chalk line is used to lay down clean reference lines which make the entire wall straight and square at the beginning to the end.
It is a pro tip to cut waste and future repair: when you are making cladding that is directional-grained/textured, order it a 5-10 percent above the amount you need.
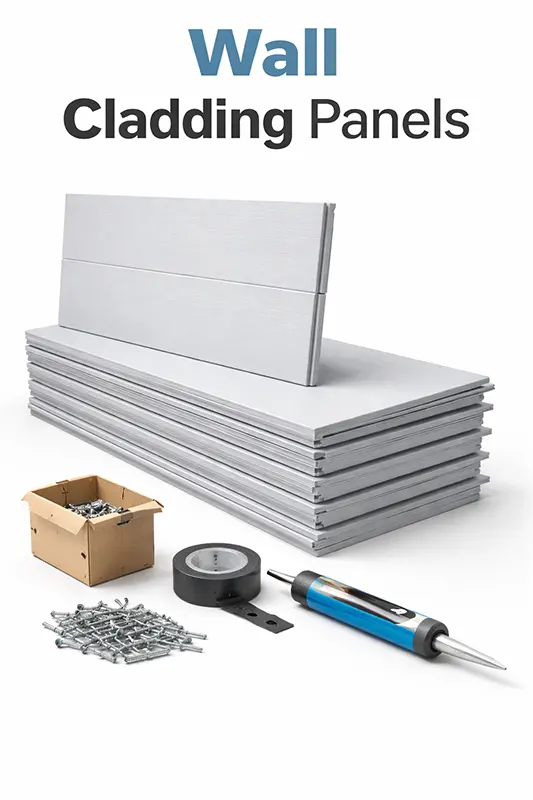
2) The kind of tools and materials that you are likely to require
Although there are no standardized requirements depending on the type of panel, the majority of installations include:
- Equipment used to set up: measuring tape, laser level of alignment, chalk line
- Power tools Cordless drill/ hammer masonry drill
- Rivet gun (some metal systems)
- Equipments to be used to cut panels: circular saw or jigsaw with the right blade, or panel shears
- Protective equipment: respiratory protective equipment, ear protection, and protective eyewear.
- Backing support system Support system: aluminum or galvanized steel battens or Treated timber battens
- Repair of hardware: screws, anchors and rivets resistant to corrosion as per the system specification
- External moisture protection system WRB (breathable where required) approved tapes, flashings, and insect mesh /vent components
- Certified neutral-cure silicone and/or MS polymer sealants system certified
- Edge trims and accessories Edge corner trims, starter tracks, profiles of joints, and strips of closure
Details: Have the manufacturer-approved fixings - mixing of metals may cause or even promote corrosion and incorrect types of heads may cause panels to crack or warranties to be breached.
3) Preparation of Surface: Prep it Out
Making a wall good by cladding makes it good--but it will not make a bad wall good.
- Flatness of the check substrate: protrusions may deform Installing Wall Cladding Panels, depressions may result in some openings at panel corners.. File the subframe in order to provide a level plane.
- Check moisture conditions: Find the solution to any leaks, rising damp or water intrusion prior to the cladding installation.
- Surface: Clean the surface of the building by dusting it off, scraping off loose paint, algae or unsecure applications.
In exterior work, a WRB is to be used and the laps sealed and completely taped as per the requirements of the manufacturer. This is to cope with incidental moisture: the cladding will serve as the major rain screen, but the backing wall should be able to cope safely with any water that gets to it.
4) Put up the supporting sub frame (battens or rails)
The majority of the cladding panels are fixed on a subframe, forming a straight mounting plane and usually ventilation cavity.
Key rules:
- To use on the outside, use corrosion-resistant materials which include: aluminum, galvanized steel; and treated timber can be applied where allowed.
- Batten space depending on what the manufacturer desires (typical center-to-center distance is 300-600 mm)
- Install subframe true and level: a starting point could be a base line and shims would be required to place subframe correctly where necessary..
- Offer a ventilated chamber to rainscreen systems (usually approximately 20-40 mm, depending on the requirements of manufacturers).
- Insect mesh/vented closure components will be used to cover the cavity on the top and bottom sides.
Best secret Use a pencil or marker to mark places of battens before you start fixing; this saves time on installing and makes the fastener pattern the same.
5) Install guide lines and install the starter tracks
The initial process is usually the laying down of a starting track or establishment of an established line of base datum.
- At the bottom of the facade start.
- Make sure that completed ground clearance (exteriors) is done to exclude splashback moisture.
- Pre-test check corner: inside and outside corners normally employ trims which must be attached first.
Setting-out advice: a mistake of 3-4 mm at the commencement may be extended to a 20-30 mm problem throughout the entire height of the elevation.Take more time and have the foundation correct.
6) Prepare the panels rightly and properly cut
The method of cutting is important since most of the cladding materials are chipped, melted or cracks when cut improperly.
- Choose the right blade, fine-tooth when working with composites, carbide-tipped when working with fibre cement and metal-cutting when working with steel or aluminium.
- Cutting should be done so as to ensure that the panel is well supported to minimize vibration and movement.
- Deburr edges where required.
- Drill holes in advance in case the system requires mechanical repair in expansion allowance.
Thermal movement: A large number of cladding materials contract/expand.Make sure that end gaps and joint clearances to be installed are kept open as per the recommendations.
7) Repairing the Panels: General Practice
The majority of panel systems are of the following fixing methods:
A) Panels are fixed by bare screw or rivet
- Fastest and often strongest.
- Washers or gaskets as required by the specification
- Chalk lines or batten marks can be used to make the screws run in a straight line..
- Fixing pressure should be controlled, excessive pressure may deform metal, compress composite cores or crack.
B) Concealed fix (clips/rails)
- Clean modern finish.
- Relies on correct lay out and a correctly matched subframe system.
- Ensure that all clips are aligned and should be fully engaged, any form of misalignment may interfere with the whole panel run.
C) Adhesive-assisted systems
- Popular in interior or other exterior systems certified adhesives.
- Substrate should be wet, smooth and dry.
- Adhere to any curing time and temperatures.
Best tip: face-fixing Control the torque used carefully - a torque-limited driver is recommended or apply constant hand pressure.
8) Joints, corners, and openings: Professional description
That is where good installations are turned to great.
Joints:
- When open-joint, use trim Fit joint.
- Spacers should be used to make the joints even.
- It is recommended that only specific points should have sealant because most rainscreen designs are based on drainage and ventilation rather than totally closed.
Corners:
- Pre-install the profiles of the fitting corners and then place the main (field) panel where necessary.
- Check the alignment of corners with level on a regular basis so as to have straight lines.
- The mitred joints are used to produce a luxurious look, but they require very precise installation; trims can be installed neatly.
Windows/doors:
- Insert the water out using flashing and tapes.
- Maintain expansion gaps around frames.
- Make sure that there are the necessary vents in door and window frames..
Description of approach on water-management basis: what does rain do once it is behind the cladding?
9) Last minute finishing and checking
Before calling it done:
- Step back to ensure that there is a straight line of Installing Wall Cladding Panels, even reveal and the spacing of fasteners should be uniform.
- Make sure that all trims are tight and are fastened.
- Make sure there is no obstruction of airflow and drainage apertures.
- Installation of protective films should be done post installation to avoid being scratched.
- Make sure that only cleaning agents are used so as not to leave a stain or finish damage by harsh chemicals.
Create a quick punch list:
- Any cracked/chipped panels?
- Any loose fixings?
- Are there irregularities or unevenness of the joint lines?
- Are there any holes that are not covered?
10) Cladding Maintenance Hints to Make Cladding appear new
The majority of cladding systems are low not zero maintenance.
- Outside cleaning is to be done once in a year and more often in the coastal or industrial areas.
- Access the sealants and flashing specifics on an annual basis.
- Make sure that broken fasteners should be secured or replaced..
- Maintain vegetation at a distance of the facade to avoid the problem of staining and dampness.
Final Takeaway
Installing Wall Cladding Panels cannot be installed by simply attaching them to a wall. It is an order, subframe and weather management and right fixing and clean detailing.Consider beforehand how to set-out, leave room to provide expansion, and consider corners and openings as important points of detail.This is the way to get a facade (or feature wall) that will remain straight, dry and attractive over years.


