


Prefabricated WPC Wall Panels: Advantages and Installation Guide
This guide explores the prefabricated wpc wall panels advantages and installation process. Traditional construction is slow. It is messy. Building a new wall involves framing, drywall, mudding, sanding, priming, and painting. Each step takes time and creates a new layer of dust. For modern, fast-paced construction and renovation, this is a major bottleneck.
Prefabricated WPC wall panels are the solution to this problem. As an installer and designer, I have seen these systems transform project timelines. They take a multi-day, messy job and condense it into a clean, one-day installation. They offer the consistent quality of a factory-made product with the style and durability of WPC.
But "prefabricated" means something different than standard paneling. It requires a different approach. This article is a deep dive based on my field experience. We will cover the specific advantages, compare them to standard planks, and provide a step-by-step installation guide.
What Are Prefabricated WPC Wall Panels?
Prefabricated WPC wall panels are large, factory-assembled wall coverings.1 They are made from Wood-Plastic Composite (WPC). Unlike small, individual planks, these are large-format sheets or systems. They are designed to cover a large area quickly. They often include integrated locking mechanisms or clip-on systems.
These panels are part of a manufacturing-first approach to construction. The hard work is done in a factory. The on-site work is just for final assembly. This is a key difference from traditional paneling. You can learn more about the base material in our guide, What Are WPC Wall Panels?.
How Are Prefabricated Panels Different from Standard WPC Panels?
Prefabricated panels are built for speed and scale.2 Standard WPC panels are built for flexibility.3 A standard panel is like a single piece of hardwood flooring. A prefabricated panel is like an entire pre-built section of a floor, ready to drop in place.
Standard WPC panels are typically small, individual planks (e.g., 15cm wide by 2.9m long). You install them one at a time. This is the method covered in our general how to install WPC wall panels guide.
A prefabricated panel might be 1.2m wide and 2.8m tall. It can cover the same area as eight standard planks in a single step.
Table: Prefabricated WPC vs. Standard WPC
| Feature | Prefabricated WPC Panels | Standard WPC Planks |
| Size | Large sheets (e.g., 1.2m x 2.8m) | Small planks (e.g., 15cm x 2.9m) |
| Installation Speed | Extremely fast. | Slower, more meticulous. |
| Labor Cost | Lower labor cost. | Higher labor cost. |
| Material Cost | Higher material cost per m². | Lower material cost per m². |
| System | Often uses clip/track systems. | Typically tongue-and-groove. |
| Handling | Requires two people. Heavy. | Easy for one person. |
| Best For | Commercial projects, large walls. | DIY accent walls, small areas. |
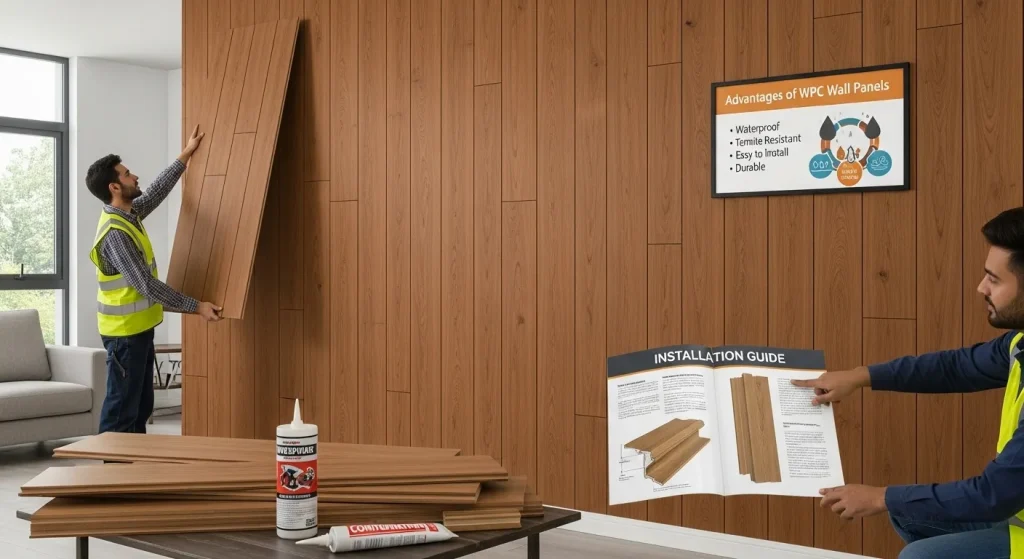
What Are the Primary Advantages of Prefabricated WPC Panels?
The main advantages are dramatic speed of installation, consistent factory quality, and lower total labor costs.4 These benefits make them a powerful choice for commercial projects, new builds, and large-scale renovations where time is money.
These systems are designed to solve the biggest problems in construction: time and mess. By moving the assembly to a factory, you get a better, faster, and cleaner result on-site.
Is Installation Really That Much Faster?
Yes. The speed increase is the number one advantage. A prefabricated system can reduce installation time by up to 70% compared to standard planks.
I have timed this on real projects. A 15-square-meter media wall built with individual fluted planks can take a skilled installer a full 8-hour day. They have to measure, cut, and fix around 100 individual planks.
Using a prefabricated system with 1.2m-wide panels, that same wall is a 2-3 hour job. You are only measuring, cutting, and fixing 3 or 4 large panels. For a hotel renovation or a commercial office fit-out, that time savings (multiplied by 100 rooms) is massive.
Do They Offer Consistent Quality?
Yes. The quality is extremely consistent. The panels are built on automated assembly lines. The seams are perfect. The finishes are flawless. There are no on-site errors.
When you build a slatted wall one plank at a time, there is a risk of human error. A small gap here, a slight misalignment there. These tiny errors can add up. With a prefabricated panel, what you see in the sample is exactly what you get, every time.
How Do Prefabricated Panels Save on Labor Costs?
Prefabricated panels save money by drastically cutting on-site labor hours.5 The material itself might cost more per square meter. But the total project cost is often lower.
Let's break down a simple project:
- Standard Planks: 8 hours of skilled labor + $500 in materials = Total Project Cost A
- Prefabricated Panels: 2 hours of labor + $800 in materials = Total Project Cost B
In many markets, "Total Project Cost B" is significantly lower. You are trading a higher material cost for a much lower labor bill. This also means the job site is "noisy" for only 2 hours, not 8.
Are They a "Cleaner" Installation Option?
Yes. They are one of the cleanest wall-finishing options available.
- No drywall dust.
- No paint or primer fumes.
- No grout mess.
- Minimal cutting.
This makes them a hero for renovation projects in occupied spaces. We can install these panels in a hospital lobby or an office without creating a huge mess that disrupts business.
Do They Still Have the Core WPC Benefits?
Yes. Underneath the "prefabricated" system, the material is still WPC. This means you get all the benefits of WPC wall panels that make the material great.
The panels are:
- Highly Durable: They resist scuffs, dents, and impacts far better than drywall.
- Waterproof: The WPC core is 100% waterproof. This makes them ideal for bathrooms, basements, and laundry rooms. You can learn more about this in our guide to WPC's waterproof and durable properties.
- Low-Maintenance: They never need to be painted, sealed, or stained. They clean with a simple damp cloth.
Where Are Prefabricated WPC Panels Best Used?
Prefabricated WPC panels are best for large, simple walls where installation speed is a priority. They are a favorite in commercial construction. They are also fantastic for large residential feature walls.
I recommend them most for these applications:
- Commercial Lobbies & Offices: They create a massive, high-impact feature wall in a short amount of time.
- Hospitality: For renovating hotel rooms, speed is everything. You can refit a room in a day.
- Retail Spaces: Create a branded, textured backdrop for products quickly.
- Healthcare: They are easy to clean and can be installed with minimal disruption.6
- Residential Great Rooms: Perfect for those two-story fireplace surrounds or massive media walls.
- Basement Renovations: A fast, waterproof, and durable way to finish large basement walls.
For visual inspiration on how these can look, browse our gallery of modern WPC wall cladding ideas.
How to Install Prefabricated WPC Wall Panels: A Step-by-Step Guide
The installation process for prefabricated panels is different from standard planks. It is less about small, repetitive steps and more about handling large, heavy sheets. This is almost always a two-person job.
What Is the General Installation Process?
The general process involves fixing a starter track or clips to the wall. The large panels are then lifted and seated into these tracks. They are secured with more clips or a hidden fastening system. It is an assembly process, not a "stick-build" process.
Step 0: Before You Begin (Crucial Prep)
Do not skip this. From my experience, 90% of failures come from poor preparation.
- Acclimate Your Panels: This is my number one rule. You must let the large panels acclimate in the room they will be installed in for at least 48 hours. Lay them flat. This lets them adjust to the temperature and humidity, preventing future warping.
- Check Your Wall: Your wall must be clean, dry, and flat. Use a long level. If you have any major dips or bows (more than 6mm over 2.5m), you must fix them. You may need to install wooden battens (furring strips) first to create a new, flat plane.7
What Tools and Materials Will You Need?
Handling large panels requires the right gear.
| Tool Category | Required Tools | Pro-Tips & Recommendations |
| Measuring | • Tape Measure • 6-Foot Level or Laser Level • Pencil | A laser level is almost essential for a large wall. It ensures your starter tracks are perfect. |
| Cutting | • Track Saw (Best) • Circular Saw with Guide (Good) • Jigsaw or Multi-Tool | A track saw gives you a perfectly straight, clean cut on large sheets. Use a fine-toothed blade (80-tooth+). |
| Fixing | • Impact Driver or Drill • Caulk Gun • Construction Adhesive • Panel Fasteners (Screws) | You must use the specific clips or fasteners that come with your panel system. |
| Safety | • Safety Glasses • Gloves | The panels are heavy and have sharp-cut edges. |
Step 1: Measure and Plan Your Layout
This is the "measure twice, cut once" step.
- Find the Center: Find the center of your wall and mark a vertical plumb line (using your laser level).
- Plan Your Seams: You want to avoid a tiny, awkward "sliver" of a panel at one end. This is a common rookie mistake.
- My Pro-Tip (Balanced Layout): Let's say your wall is 4m wide and your panels are 1.2m wide.
4.0m / 1.2m = 3.33 panels.- A bad layout is: Full (1.2m), Full (1.2m), Full (1.2m), and a tiny sliver (0.4m). This looks terrible.
- A good layout is: Start with a half-panel (0.6m), then Full (1.2m), Full (1.2m), and end with another half-panel (0.6m). It looks balanced and professional. Or start with a
(0.4m / 2) = 0.2mpartial panel.
- Plan your cuts before you lift a single panel.
Step 2: Install the Starter Track or Clips
Most prefabricated systems use a metal starter track. This track must be installed at the bottom of the wall.
- Use your laser level to mark a perfectly level line for the track.
- Locate the wall studs.
- Secure the starter track to the wall, screwing it firmly into the studs.
- This track must be perfectly level. If it is not, every panel you install on top of it will be crooked.
Step 3: Cut Your Panels (If Needed)
You will need to cut your first and last panels (for a balanced layout). You will also need to cut holes for outlets and light switches.
- For Straight Cuts: Place the panel face down on a set of sawhorses. Use a track saw or a circular saw with a straight-edge guide. Cutting from the back prevents chipping on the visible face.
- For Outlets:
- Measure very carefully from the edge of the wall and the floor to the outlet box.
- Transfer these measurements to the panel.
- Drill starter holes in the corners of your box.
- Use a jigsaw or oscillating multi-tool to cut out the hole.
Step 4: Lift and Seat the First Panel
This is a two-person job.
- Apply a bead of construction adhesive to the back of the panel (check manufacturer's specs). Some clip systems do not require adhesive.
- Carefully lift the panel.
- Set the bottom edge into the starter track.
- Tilt the panel up and press it firmly against the wall.
- Use your level one more time on the vertical edge to ensure it is perfectly plumb.
Step 5: Secure the Panel and Continue
Once the panel is in place, you must secure it.
- The panel system will have a "fastening flange" or a set of clips.
- Drive screws through this flange into the wall studs. This fastener will be hidden by the next panel that overlaps it.
- Take your second panel. Lift it, seat it in the bottom track, and slide it into place. The edge of this panel will lock into or cover the flange of the first panel.
- Secure the second panel.
- Repeat this process across the wall.
Step 6: Finishing with Trims and Corners
The job is not done until the edges are finished. Prefabricated systems come with matching trim pieces.
- End Caps: These are used to cover the exposed edge of the last panel on a wall.
- Corner Trims: These are L-shaped pieces used to create a clean finish on inside or outside corners.8
- These trims are typically installed with a small amount of construction adhesive and, if needed, a few small pin nails.
What Are the Disadvantages or Common Problems?
Prefabricated panels are not perfect for every job. You must be aware of the trade-offs.
- Higher Material Cost: The upfront cost per square meter is higher than standard planks.
- Handling and Logistics: This is the biggest problem. A 1.2m x 2.8m panel is heavy and awkward. Getting it into a basement or up a narrow apartment stairwell can be a nightmare. You must plan your delivery path.
- Less DIY-Friendly for Solo Work: While the system is simple, the handling is not. A standard plank is a one-person job. A prefabricated panel is a two-person job, minimum.
- Less Flexible for Complex Walls: If your wall has many small angles, alcoves, or windows, standard planks are often easier. Cutting a large, expensive panel to fit a complex shape is stressful and creates more waste.
How Do Prefabricated WPC Panels Compare to PVC Panels?
Prefabricated WPC panels are a much more durable, high-end product than PVC.9
- Feel: WPC is a "composite" with wood fibers.10 It is rigid, dense, and feels solid. PVC is 100% plastic. It is very lightweight and can feel hollow or "flimsy."
- Durability: WPC has far superior impact resistance. A sharp knock that would crack or puncture a PVC panel will just bounce off a WPC panel.
- Aesthetics: WPC panels often have more realistic, matte, and deep-textured finishes.
- Cost: WPC is more expensive.For a detailed breakdown, you can read our WPC vs. PVC wall panels comparison.
The Final Verdict on Prefabricated WPC
Prefabricated WPC wall panels are a game-changer for large-scale projects. They deliver on the promise of a fast, clean, and high-quality installation. The advantages of speed and lower labor costs are undeniable. They provide all the core benefits of WPC in a large-format system.
While they may be overkill for a small DIY accent wall, they are the clear professional choice for commercial spaces and large, modern homes.
For a complete overview of all your WPC options, from small planks to these large-scale systems, our WPC wall panels guide is the perfect next step.


