


Waterproof Balcony Floor Tiles: Installation and Maintenance
The process of waterproof balcony floor tiles installation and maintenance is the single most important factor in protecting your building. A leaking balcony is not a small problem. It is a structural crisis in the making. Water is relentless. Once it gets under your tiles, it can rot structural supports, cause mold, and lead to thousands in damage.
I’ve been called to inspect failed balcony jobs more times than I can count. The story is almost always the same. The homeowner chose a beautiful tile. The installer put it down. It looked perfect. Then, six months later, the ceiling in the room below the balcony started to stain and crumble.
The problem was not the tile. The problem was that the installer treated the balcony like a bathroom floor. A balcony is an exterior roof. It must be waterproofed like a roof.
This guide will walk you through the entire process. We will cover the materials, the critical installation steps, and the long-term maintenance. This is how you build a balcony floor that is truly waterproof and lasts for decades.
What Does "Waterproof" Really Mean for Balcony Tiles?
"Waterproof" does not mean the tile itself stops all water. It means the entire system is waterproof. The tile is just the top, visible layer. The real work is done by a specialized waterproofing membrane underneath the tile.
The tile you choose is the "shield." It takes the brunt of the weather and foot traffic. But the membrane is the "seal." It is a continuous, unbroken layer that connects to the building and the drains. It ensures that any water that does get through the grout (and it will) is safely channeled away without ever touching the building's structure.
Which Tile Materials Are Best for a Waterproof System?
The best tile material is porcelain. It has an extremely low water absorption rate (less than 0.5%). This means the tile itself will not soak up water. Glazed ceramic is a secondary choice, but it is weaker. Natural stone is porous and requires sealing.1
Let's look at the options.
Porcelain vs. Ceramic: Which is Truly Waterproof?
Porcelain tile is the clear winner for any outdoor, wet environment. It is denser, stronger, and far less porous than ceramic tile. Most ceramic tile is not rated for outdoor use, especially in climates with freeze-thaw cycles.
- Porcelain: To be certified as porcelain, a tile must have a water absorption rate of 0.5% or less. It is fired at a higher temperature, making it very dense and strong. It is the best choice for a weather-resistant balcony flooring solution.
- Ceramic: Standard ceramic tile has a higher absorption rate, often over 3%. Water can get into the tile. In a cold climate, this trapped water will freeze, expand, and crack the tile.3 You must only use ceramic tile if it is specifically rated for exterior use.
Here is a simple breakdown:
| Feature | Porcelain Tile | Ceramic Tile |
| Water Absorption | < 0.5% (Impervious) | > 0.5% (Vitreous or Semi-Vitreous) |
| Durability | Extremely High | Moderate |
| Freeze-Thaw Resistant | Yes | Not always (must be rated) |
| Cost | Moderate to High | Low to Moderate |
| Best Use | Any balcony, especially in harsh climates | Mild climates, covered balconies only |
What About Natural Stone Tiles?
Natural stone like slate, granite, or travertine can be used.4 But they are not "waterproof" on their own. Stone is naturally porous.5 It will absorb water. To use stone, it must be part of a robust waterproofing system and be treated with a high-quality penetrating sealer.
The main issue with stone is maintenance. You must re-apply the sealer every 1-3 years. If you fail to do this, the stone will absorb water, which can lead to staining, salt damage (efflorescence), and cracking in cold weather.
Is Slip Resistance as Important as Waterproofing?
Yes. A waterproof balcony that is a skating rink when wet is a failed balcony. Safety is critical. When choosing your porcelain tile, you must look for a textured surface. Never, ever use a smooth or polished tile on a balcony floor.
Look for tiles with a "structured" or "textured" finish. These often mimic wood grain or cleft stone.6 The technical rating to look for is the Dynamic Coefficient of Friction (DCOF). You need a DCOF rating of 0.42 or higher for a level, wet surface. This is a crucial part of choosing non-slip balcony flooring.
How Do You Prepare a Balcony for Waterproof Tile?
Proper preparation is 90% of the job. You must ensure the balcony substrate is clean, sound, and properly sloped toward the drains. A failure here guarantees the entire system will fail.
The substrate is the "floor" before you add anything. This is usually concrete or plywood sheathing. It must be able to support the weight of the tiles, mortar, and people.
Step 1: Assess and Clean the Balcony Substrate
The substrate must be solid. If you have a concrete balcony, it must be free of large cracks, flaking, or "spalling." Any loose material must be removed. All old paint, glue, or sealers must be ground off. The waterproofing membrane needs a clean, bare surface to bond to.7
If the balcony is wood-framed, the plywood subfloor must be rigid. It cannot bounce or flex when you walk on it. If it flexes, the grout lines will crack. You will likely need to add a layer of mortar board (cement backer board) to create a stable, water-resistant surface.
Step 2: What is "Sloping" and Why is it Essential?
Sloping is the process of creating a slight, intentional grade on the balcony floor. This grade uses gravity to direct all water toward the drains. Without a proper slope, water will pool, creating "bird baths" that will eventually soak through the grout and cause failure.
This is the most common mistake I see. An installer lays a perfectly level floor. It looks great. But the first time it rains, a huge puddle forms in the middle. That standing water will sit for days. It will soak into the grout and constantly attack the membrane underneath.
The industry-standard slope is 1/4 inch of fall for every 1 foot of run. This means for a balcony that is 8 feet deep, the edge by the building must be 2 inches higher than the edge by the drain. This slope is non-negotiable. If your balcony is currently flat, you must create this slope using a specialized sloping compound (a type of mortar) before you do anything else.
Step 3: Applying the Waterproofing Membrane
This is the most critical step. The membrane is the real waterproof layer. It must be applied perfectly. You have two main choices for high-quality membranes.
1. Liquid-Applied Membranes
This is a modern, popular choice. It is a thick, paint-like liquid that you apply with a roller or trowel. It cures into a seamless, flexible, rubbery layer.
- How it Works: You "paint" the membrane on in several thick coats. The key is to embed a "reinforcing fabric" into the first coat while it's wet. This fabric is crucial. You must apply it at all corners (wall-to-floor), around drains, and over any cracks. This fabric acts like rebar in concrete. It gives the membrane strength and ensures it won't tear.
- My Experience: Do not skip the fabric. I've seen installers just paint the liquid on. It looks fine, but the building will naturally shift and move. A tiny crack will form in the substrate. Without the fabric, the membrane will tear. With the fabric, it will stretch and stay waterproof.
2. Sheet Membranes
These are thick, pre-made sheets of waterproof material. They are often "peel and stick" or are laid in a bed of thinset mortar. They provide a very consistent thickness and are a "factory-made" solution.
- How it Works: You unroll the membrane and press it into place. The challenge is the seams. Every place one sheet overlaps another is a potential weak spot. You must follow the manufacturer's instructions exactly for overlapping and sealing the seams. You also need special pre-formed corner pieces.
Which Membrane is Better?
For most balconies, I prefer a high-quality liquid-applied membrane with fabric reinforcement. It creates a truly seamless, "monolithic" pan that is bonded to the entire surface. Sheet membranes are also excellent, but they require a higher level of skill to handle the seams and corners perfectly.
How Do You Install the Tiles for a Waterproof System?
Once your membrane has cured, you are ready for tile. The tile installation over the membrane is also a critical part of the waterproof system. You must use the right adhesive and the right grout.
Step 4: Choosing the Right Mortar (Thinset)
You cannot use standard "thinset" mortar. You must use a polymer-modified or epoxy mortar. It must be rated for exterior use and for bonding to a waterproofing membrane.
The mortar acts as the glue. A standard, cheap mortar can absorb water. It can break down over time. A polymer-modified mortar has special additives. These make it stronger, more flexible, and more water-resistant. This flexibility is key. Your balcony will expand and contract with temperature changes.9 The mortar needs to flex with it.
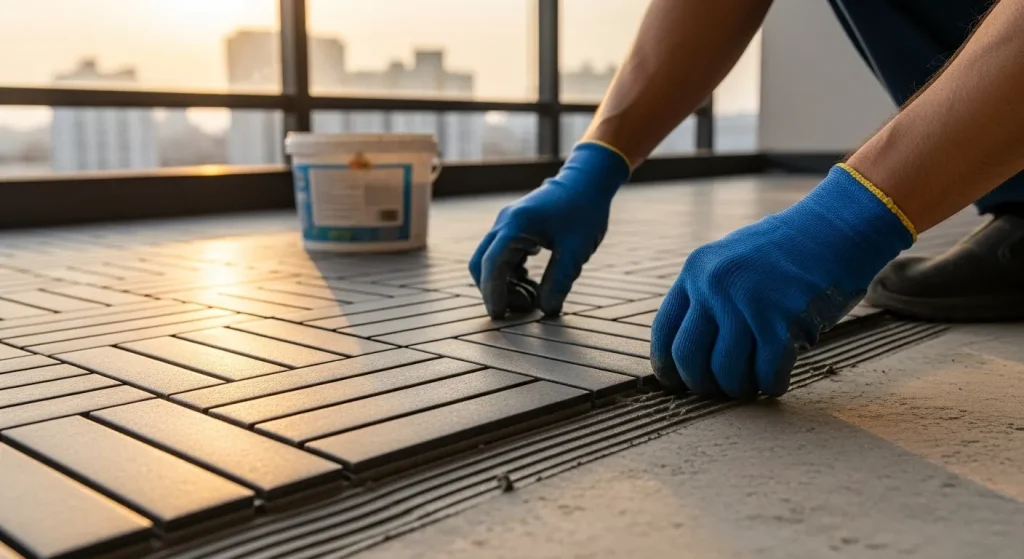
Step 5: Setting the Tiles (Trowel Technique)
This is a critical detail. When you spread the mortar, you must ensure 100% coverage on the back of the tile.
- Bad Technique: Troweling mortar on the floor and just pressing the tile in. This will leave air gaps. These air gaps will fill with water. In a freeze, this water will expand and "pop" the tiles right off the floor.
- Correct Technique ("Back-Buttering"):
- Trowel your mortar onto the floor with a notched trowel.
- Trowel a thin, flat "skim coat" of mortar onto the back of the tile itself.
- Press the tile into the floor mortar with a slight twisting motion.
This "back-buttering" ensures a solid, void-free bond. It is the only professional way to install exterior tile.
Step 6: Choosing the Right Grout
Grout is the material that fills the joints between the tiles.10 Most people think grout is waterproof. It is not. Standard cement grout is a sponge. Water passes right through it.
You have two main choices:
- Cement-Based Grout (Polymer-Fortified): This is the standard grout. It is a cement product. It is porous. It will stain. It must be sealed.
- Epoxy Grout: This is the superior choice. Epoxy grout is a two-part resin system.11 It is not cement. When it cures, it is basically a solid piece of plastic. It is 100% waterproof and stain-proof. It does not need to be sealed.
Step 7: Sealing the Grout (If Using Cement Grout)
If you use a cement-based grout, this step is not optional. You must seal it. After the grout has fully cured (wait at least 72 hours), you must apply a high-quality, penetrating grout sealer.
This sealer soaks into the porous grout.12 It repels water. This is your first line of defense. This sealer will wear away. It must be re-applied every 1-2 years. This is the main reason epoxy is the better, lower-maintenance choice.
How Do You Maintain Waterproof Balcony Tiles?
Your waterproof system is built. Now you must protect it. Proper waterproof balcony floor tiles maintenance is simple. It is about keeping the floor clean and inspecting it for small problems before they become big ones.
What is the Best Way to Clean Balcony Tiles?
The best way to clean is with a pH-neutral tile cleaner. Avoid harsh chemicals like bleach or acid-based cleaners. These can eat away at cement-based grout and damage sealers.
- Sweep Regularly: Keep the floor free of leaves, dirt, and pollen. This debris traps moisture and can lead to mold and staining.
- Scrub Occasionally: For a deep clean, use a soft-bristle brush and a bucket of water mixed with a pH-neutral tile cleaner.
- Rinse Thoroughly: Rinse all soap residue away. Soap scum can attract more dirt.14
- Avoid Pressure Washers: Do not use a high-pressure power washer. It is too aggressive. It can blast the grout right out of the joints and destroy your waterproofing. A standard garden hose is all you need.
How Often Should You Inspect Your Balcony Tile?
You should do a quick visual inspection twice a year. Do it in the spring and in the fall. You are looking for problems.
- Look for any cracked tiles.
- Look for cracked, crumbling, or missing grout.
- Look for caulking that is peeling or pulling away from the walls.
- After a rain, check for puddles ("bird baths"). This is a sign of a slope failure.
What Are the Signs of a Failing Waterproof System?
Finding a small problem early can save you thousands.
- Cracked Grout: This is the #1 warning sign. A grout crack is a highway for water. It bypasses your sealed surface and goes straight to the membrane.
- "Hollow" Sounding Tiles: Tap on your tiles with a golf ball or your knuckles. They should sound solid. If a tile sounds hollow, it means it has "de-bonded." The mortar has failed. Water is likely trapped underneath it.
- Efflorescence: This is a white, powdery, or crusty substance that appears on the grout lines. This is a clear sign of a problem. It means water is getting under the tiles. It is dissolving mineral salts in the concrete and then evaporating, leaving the salt deposit behind.
- Stains on the Ceiling Below: This is the final, worst-case sign. It means your membrane has completely failed.
How Do You Repair a Cracked Tile or Grout Line?
You must fix these problems immediately.
- Fixing Cracked Grout: Use a grout removal tool (a small, carbide-tipped scraper). Scrape out all of the old, cracked grout in that joint. Vacuum the dust. Re-grout the joint with a matching grout. If you used cement grout, you must seal the new repair.
- Fixing a Cracked Tile: This is more complex. You must carefully break and remove the single cracked tile. Do not damage the membrane underneath. Scrape away the old mortar. Apply new, polymer-modified thinset. "Back-butter" the new tile. Set it in place. Grout the joints. This is a delicate repair.
Are Tiles Always the Best Waterproof Choice?
Tiles are a fantastic, durable, and beautiful choice. But they are a complex system. They are only as good as the installer. What about other options?
How Do Tiles Compare to WPC Balcony Floor Panels?
Tiles are a "permanent" solution. WPC balcony floor panels are often a "floating" solution. WPC (Wood-Plastic Composite) tiles or planks are a great alternative. They interlock and sit on top of your balcony. Water falls through the gaps and follows the balcony's slope to the drain.
- WPC: Easier and cheaper to install. Warmer underfoot.
- Tile: More durable and permanent. Has a more "premium" look.
- The comparison often comes down to budget and a preference for a "hard" vs. "soft" surface.
What About Vinyl Balcony Flooring?
When we compare wooden vs vinyl balcony flooring, "vinyl" in an exterior setting usually means a single sheet. This is a "deck vinyl" membrane. It is a heavy-duty, walkable, waterproof sheet. It is essentially a roofing material you can walk on.
This is a very good waterproof solution. It has no grout lines. It is a single, continuous surface. It is less "elegant" than tile, but it is extremely functional and often used in commercial settings.
Final Thoughts: The System is Everything
A waterproof tile balcony is a high-performance system. The tile you see is just the armor. The real waterproofing is the hidden layers: the slope, the membrane, the reinforced corners, and the correct adhesives.
There are many great options in a balcony outdoor flooring guide. But if you choose tile, you cannot cut corners. My final advice is this: find an installer who talks more about the membrane than they do about the tile. That is the person who understands how to build a balcony that will last.


