


How to Install WPC Wall Panels Step by Step
Installing WPC (Wood Plastic Composite) wall panels is a straightforward process that involves preparing a flat surface, measuring your space, and securing the panels using either construction adhesive or metal clips. You do not need a professional contractor for most residential projects; with the right adhesive and a few hours of acclimatization, you can achieve a seamless, factory-grade finish yourself.
In this guide, you will master:
- Properly acclimating panels to prevent warping.
- Preparing uneven walls using the batten method.
- Cutting panels cleanly around outlets and corners.
- Choosing between glue-down vs. clip-installation methods.
- Finishing edges professionally with trims or miters.
Tools and Materials Checklist
Before you begin, gather the right equipment. Using the correct adhesive and saw blade is the difference between a long-lasting installation and panels that pop off after a season.
- Measuring & Layout: Tape measure, pencil, spirit level (essential for the first panel), and a laser level (optional but helpful).
- Cutting: Fine-tooth saw (circular saw or jigsaw with 60T+ blade), utility knife.
- Adhesive: High-strength construction adhesive (solvent-based or hybrid polymer like Liquid Nails Heavy Duty or Gorilla Grab). Do not use water-based wood glue.
- Fasteners: Metal mounting clips (if using the clip system) and stainless steel screws.
- Safety Gear: Dust mask and safety goggles (WPC dust is fine and powdery).
- Optional: Double-sided foam tape (for instant hold while glue cures) and a caulking gun.
Phase 1: Preparation (Don't Skip This)
Acclimating Your Panels
Manufacturer Recommendation: This is the step most DIYers skip, leading to buckled walls. WPC is a composite material that expands and contracts with temperature changes.
- Remove the panels from their packaging.
- Lay them flat on the floor in the room where they will be installed.
- Let them sit for 24 to 48 hours. This allows the material to adjust to the room's specific temperature and humidity.
Wall Surface Prep
Your panels are only as stable as the wall behind them.
- Clean and Dry: Ensure the wall is free of dust, grease, loose paint, or wallpaper.
- Check for Flatness: Place your spirit level against the wall. If gaps exceed 5mm, the adhesive may not make contact.
- The Solution for Uneven Walls: If your wall is wavy or damaged, install a framework of wooden or WPC battens (furring strips) horizontally. This creates a perfectly flat surface to attach your panels to.
Phase 2: Measuring and Cutting WPC Panels
Accuracy here saves material. Always measure twice before making your cut.
How to Cut WPC Without Chipping
WPC is durable, but the decorative film can chip if cut aggressively.
- Blade Selection: Use a carbide-tipped blade with a high tooth count (60T or higher).
- Direction: If using a circular saw, cut with the decorative side facing down. If using a handsaw or jigsaw, cut with the decorative side facing up.
For a deep dive into blade speeds and preventing jagged edges, read our full guide on how to cut WPC wall panels without chipping.
Cutting Around Outlets and Switches
- Measure the distance from the edge of the previous panel to the outlet box.
- Mark the square on the back of the panel.
- Drill large pilot holes in the four corners of your marked square.
- Insert your jigsaw blade into a pilot hole and cut along the lines.
- Test the fit before applying glue.
Phase 3: Installation Methods (Choose One)
Method A: The Glue-On Method (Best for Flat Drywall)
This is the fastest method for standard interior renovations.
- First Panel: Place the first panel on the wall. Use a spirit level to ensure it is perfectly plumb (vertical). This sets the alignment for the entire room.
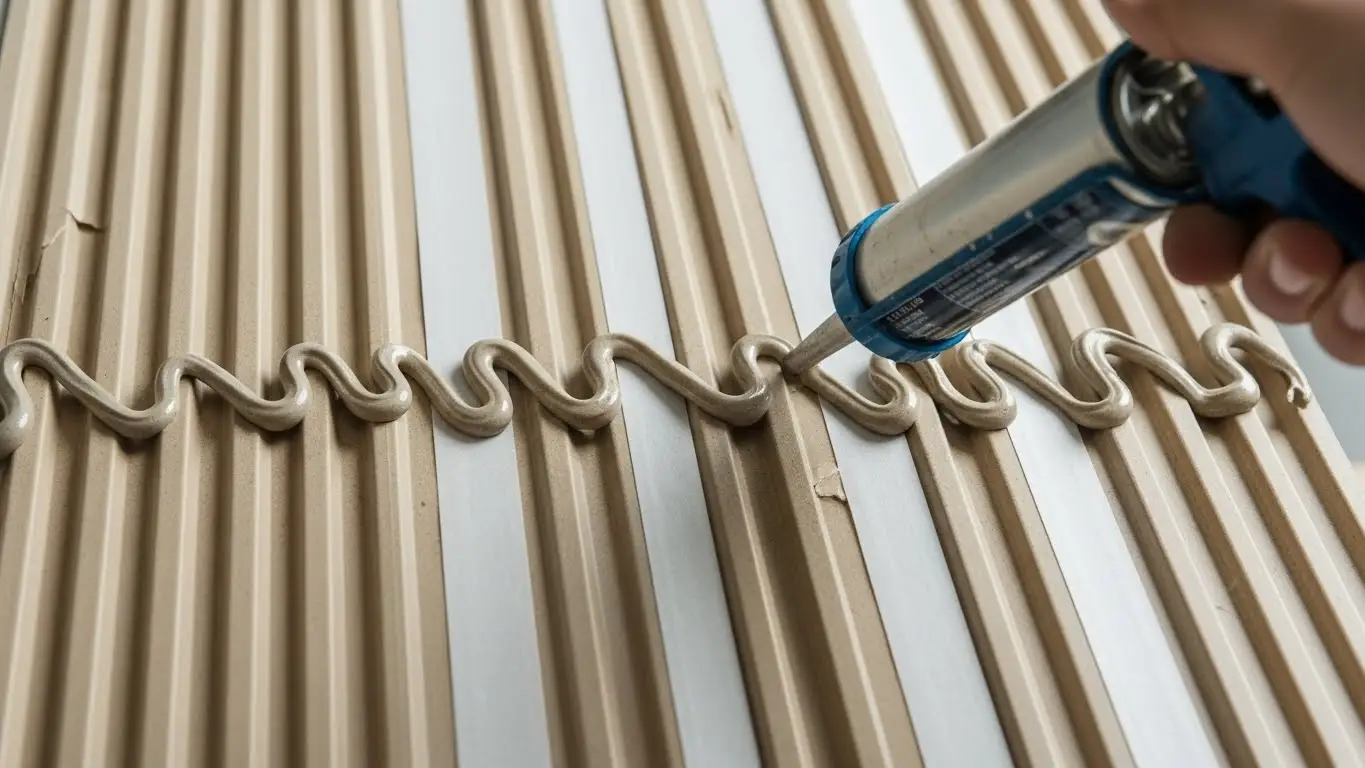
- Apply Adhesive: Flip the panel over. Apply construction adhesive in a Zig-Zag or "S" pattern across the back. Add a few vertical strips of double-sided foam tape between the glue lines—this tape holds the panel in place instantly while the heavy-duty glue cures.
- Install: Press the panel firmly against the wall. Apply pressure evenly from top to bottom.
- Interlock: Apply glue to the next panel. Insert the tongue of the new panel into the groove of the previous one. Tap gently with a rubber mallet if needed to close the gap.
Method B: The Clip & Batten Method (Best for Uneven Walls)
This method is preferred for heavier cladding or when you want the option to remove panels later.
- Install Battens: Screw horizontal wooden or WPC battens into your wall studs, spaced 40-60cm apart.
- First Panel: Screw the lip of the first panel directly into the batten on the starting side.
- Attach Clips: On the groove side of the panel, slide a metal mounting clip onto the lip where it intersects with a batten. Screw the clip into the batten.
- Continue: Slide the next panel into the clip. The clip is now hidden, holding both panels securely.
Phase 4: Corner and Edge Finishing
Professional finishing separates a DIY look from a high-end installation.
- Internal Corners: You can butt the panels against each other, but for a cleaner look, use an internal corner profile trim. Install the trim first, then slide your panels into it.
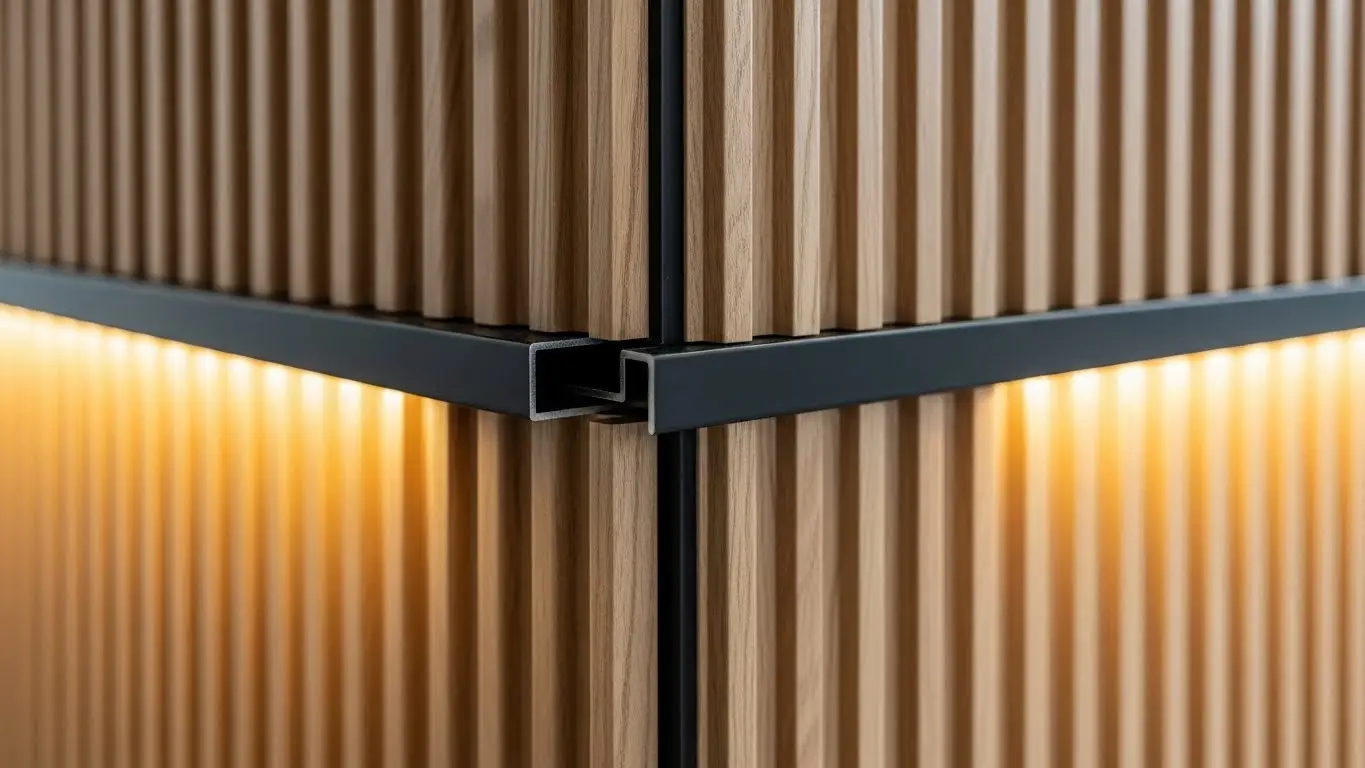
- External Corners:
- Option 1 (Trim): Use an L-shaped metal or WPC corner trim. Glue this over the raw edge where the two walls meet.
- Option 2 (Mitering): If you have a precise table saw, cut the edges of two panels at 45-degree angles so they meet perfectly. This requires high skill but offers a seamless "waterfall" effect.
- End Caps: If a panel wall ends in the middle of a room, use a U-channel end cap to hide the hollow core structure.
Common Mistakes to Avoid
- Ignoring Expansion Gaps: WPC moves. Always leave a 2-3mm gap at the very top (ceiling) and bottom (floor) of the wall. Cover this gap with skirting boards or cornice molding.
- Using the Wrong Glue: Never use standard white wood glue (PVA) or water-based "No More Nails" that isn't rated for non-porous surfaces. It will not bond to the plastic content in WPC.
- Pattern Repetition: Before gluing, dry-lay your panels to ensure the wood grain pattern doesn't look repetitive or artificial. Rotate panels 180 degrees if the pattern looks too identical to the neighbor.
Frequently Asked Questions (FAQ)
Can I install WPC panels directly over tiles?
Yes, provided the tiles are secure, flat, and clean. Scuff the tiles with sandpaper first to improve adhesion, and use a high-quality polyurethane construction adhesive.
Do WPC panels need a specific expansion gap?
Yes. You must leave a 2-3mm gap at the top and bottom of the installation, and at corners, to allow for thermal expansion. Without this, panels may bow in hot weather.
Can I use WPC panels in a bathroom or shower area?
WPC panels are waterproof and excellent for bathrooms. However, for direct shower enclosures, ensure you silicone seal all tongue-and-groove joints to prevent water from getting behind the cladding.
Can I paint WPC wall panels?
While possible with specialized plastic primers, it is not recommended. WPC panels come with a durable factory finish intended to be maintenance-free; painting adds a maintenance layer that can peel.
How do I clean WPC wall panels?
Simply wipe them down with a damp cloth and mild soapy water. Avoid abrasive scrubbers, harsh solvents, or chlorine bleach, which can damage the protective film.
Is it better to use glue or clips for installation?
Glue is faster and thinner, making it ideal for flat drywall. Clips are better for uneven walls (used with battens) or if you plan to disassemble the wall in the future.
Can I install these panels outdoors?
Standard interior WPC panels are not UV-rated for direct sunlight and will fade. You must buy specific Exterior WPC Cladding (co-extruded) which has a UV-protective cap layer.
How do I fix a scratch on a WPC panel?
For minor scratches, you can often use a furniture repair marker that matches the wood tone. Deep scratches usually require replacing the individual panel.
Conclusion
Installing WPC wall panels is one of the most high-impact, low-effort upgrades you can make to a space. By following the "measure, acclimate, and secure" protocol, you ensure a durable installation that adds value and style to your property.
Ready to start your project? Explore our full range of WPC Wall Panels here or contact our team for bulk wholesale inquiries.


