


PVC Wall Panels for Home Renovation: Materials, Care, and Costs 101
If you're mapping out PVC Wall Panels for Home Renovation and want plain-English guidance, this 101 walk-through covers the essentials: what the panels are, how they're built, what specs matter, where they work best, how installation typically goes, day-to-day care, and realistic budgets. By the end, you'll know how to compare options with confidence - and avoid the missteps that cost time and money.
What They Are and Why Homeowners Choose Them
PVC (polyvinyl chloride) wall panels are prefabricated cladding boards that lock together to create a clean, continuous surface on walls or ceilings. Think of them as a grout-free alternative to tile that's light to handle, fast to fit, and made for moisture. Because they come in wood looks, stone effects, matte and gloss colors, and even subtle textures, you can dial in a look without the price or upkeep of the real thing.
Practical reasons people pick them:
• Moisture resilience: A non-porous skin shrugs off steam, splashes, and humidity - ideal for bathrooms, laundry rooms, and basements.
• Low effort cleaning: Fingerprints, soap film, and grease wipe away with a mild cleaner, no scrubbing into grout lines.
• Speed of install: Wider panels cover more wall per pass than small-format tiles, cutting labor time.
• Lightweight handling: Easier to lift on ladders and safer over head-height runs, especially on ceilings.
• Versatile aesthetics: Printed films and co-extruded caps simulate oak, marble, terrazzo, and more, often at a fraction of the cost.
• Forgiving to imperfect walls: Use trims and furring to help panels mask slight undulations and patch areas.
How Panels Are Built: Core, Skin, and Joint Components
Understanding the components ensures a better product - room match.
Core Options:
• Hollow-Core PVC: Ribbed inner structure offers a lightweight, rigid build.Good for most walls and ceilings where impacts are modest and budget matters.
• Solid-Core PVC: Denser and more robust, it resists knocks in hallways, kid zones, and lower wall sections.
• Composite Cores: PVC paired with WPC (wood - plastic composite) or foam PVC to increase rigidity and keep large sheets flatter - useful for shower surrounds or areas where fewer seams are the goal.
Surface Finishes:
• Printed Film + Clear Wear Layer: The everyday standard - delivers the pattern and a protective topcoat to fend off scratches and stains.
• Laminated Foil: Thermally bonded decorative layers improve stain resistance and elevate tactility.
• Co-Extruded Cap (ASA/PMMA): UV-resistant capstock that keeps colors true in sunny rooms.
• Embossed/3D Textures: Gentle embossing or woodgrain increases realism - confirm it won't trap oil if planned for a backsplash.
Edges and Joining Systems:
• Click-fit T&G: Tongue-and-groove engagement offers rapid, reliable alignment with concealed fasteners.
• Shiplap or square: Trim or H-profile end treatments yield uniform, polished joints.
• V-groove profile: A narrow channel introducing a plank-like shadow line.
Specs That Actually Matter When You Compare
When shopping for PVC Wall Panels for Home Renovation, look past the pretty sample and read the technical sheet:
• Thickness And Density: Hollow-core panels typically run 5 - 10 mm; solid sheets 3 - 6 mm. Thicker, heavier panels feel sturdier and bridge small wall inconsistencies better.
• Size And Format: Standard widths run 250 - 400 mm with lengths of 2.4 - 3.0 m. Large-format panels (1220×2440 mm / 4×8 ft) help limit seams in shower enclosures and behind counters.
• UV Stability: In areas with strong daylight, select UV-stable caps to reduce fading and yellowing.
• Fire Performance: Verify that the declared rating (for example, ASTM E84 or EN 13501-1) satisfies local building codes, especially in kitchens and multi-family applications.
• VOC And Indoor Air Quality: When odor sensitivity or bedroom use is a factor, favor low-VOC certifications like GREENGUARD Gold or equivalent.
• Wet-Area Suitability: Some products aren't approved for direct-wet use; confirm the manufacturer's “shower-approved” or “wet-room” status.
• Heat Tolerance: PVC softens near 60°C/140°F. Keep safe clearances from stoves, heaters, and heat registers; install protective heat shields as specified.
• Warranty And Support: Select vendors with written coverage for discoloration, delamination, and manufacturing defects, and with compatible trims readily stocked.
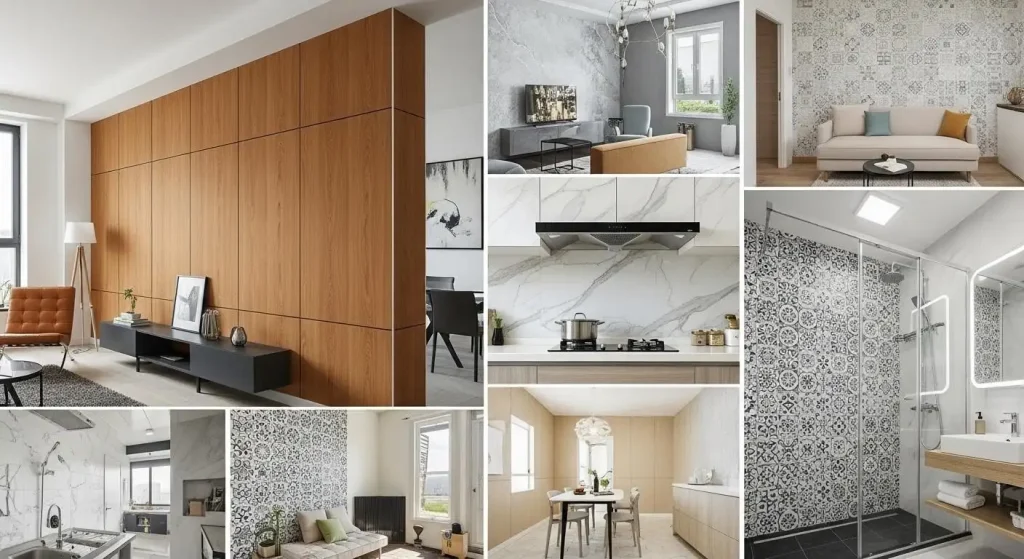
Best Rooms and Smart Uses
• Bathrooms And Showers: Recommended for wet wall and ceiling surfaces. Use compatible adhesives, seal trims carefully, and run a sanitary silicone bead at corners and tub lines.
• Kitchens: Excellent behind sinks and as easy-wipe feature walls. Near stoves, add metal or glass heat shields and observe clearance to burners.
• Basements And Laundry Rooms: Tolerant of humidity on masonry or framed walls. Where condensation is a risk, allow for airflow or use furring strips to create a drainage plane.
• Living Areas And Bedrooms: Create an accent wall with wood-look panels for warmth without seasonal wood movement. On ceilings, lightweight hollow-core panels can tidy up old plaster or popcorn.
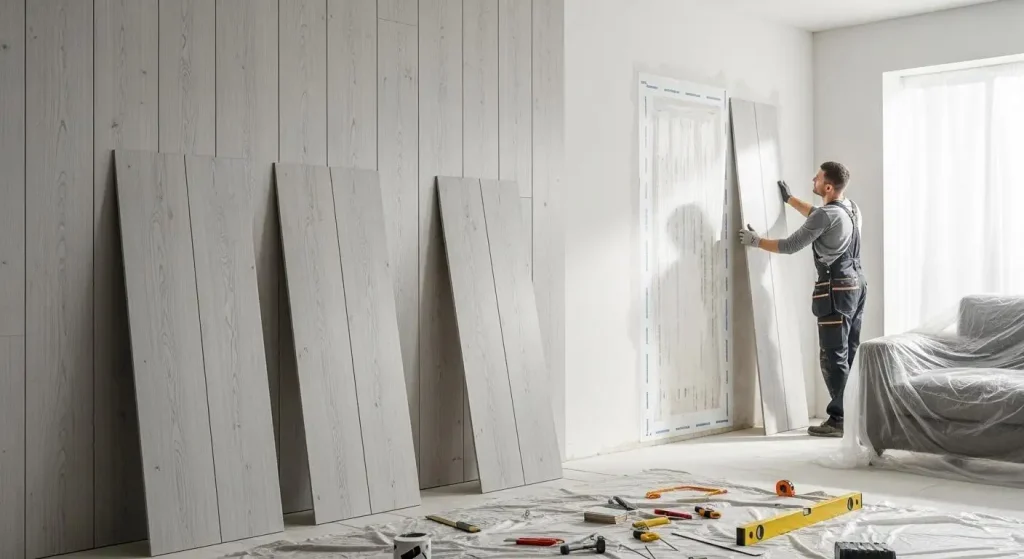
Installation in Plain English
Even if you hire a pro, knowing the order of operations prevents headaches.
Preparation:
•Inspect The Substrate: It must be sound, dry, and reasonably flat. Remove loose paint and failing tile; scrape away bumps that might telegraph through.
•Manage Moisture: Solve leaks before you cover them. In basements or exterior walls, follow local guidance on vapor barriers.
•Acclimate The Panels: Store flat on site for 24 - 48 hours so temperature and humidity equalize.
•Plan The Layout: Dry-fit to balance seam lines and pattern repeats. Mark studs for mechanical fixings in wet zones and ceilings.
Tools and Fixings:
•Cutting: A fine-tooth handsaw, a circular saw with a plastic-rated blade, or a sharp utility knife for thinner sheets.
•Adhesives And Fasteners: Use solvent-free, PVC-safe construction adhesive. In showers, ceilings, or over furring, add stainless or coated screws/staples into framing.
•Trims And Sealants: Starter tracks, internal/external corners, end caps, H-joins, and high-quality sanitary silicone for wet seams.
Typical Sequence:
•Set Trims First: Get starter rails and corner pieces dead plumb and square; they define the finished look.
•Place The First Panel Perfectly: This panel sets the line for all others; take time to level it.
• Attach Panels: Run vertical adhesive lines, seat panels home, and fit mechanical fasteners where specified. Keep a 3 - 5 mm expansion gap at all perimeters.
• Honor The Layout: Respect the layout guide, aligning or staggering panels per manufacturer instructions.
• Seal Splash Zones: Use silicone in corners, at bath/shower transitions, and around any penetrations. Tool smooth and immediately clean excess.
• Final Pass: Verify tight fits, tongues fully engaged, and unbroken sealant before any water contact.
Costs and Budgeting Without Guesswork
Costs fluctuate by brand, thickness, finish, and room complexity; use these figures as a budgeting guide for PVC wall panels in home renovations:
• Materials (Panels): About $2 - $7 per sq ft for most hollow-core and midgrade solid products; premium textured or co-extruded surfaces can exceed this.
• Trims And Profiles: Roughly $0.50 - $2.00 per linear foot, dependent on finish and profile style.
• Adhesives And Sealants: Plan for $0.25 - $0.75 per sq ft in adhesive plus several tubes of sanitary silicone for wet areas
Example snapshots:
• 100 sq ft shower surround with trims and silicone: roughly $500 - $1,200 in materials; $400 - $900 labor if hired out.
• 40 sq ft kitchen backsplash: $150 - $400 in panels and trims; $150 - $350 labor.
To tighten the range for your home, get two or three quotes that include substrate prep, trims, adhesives, and sealants - not just panel price.
Care and Maintenance That Actually Works
Routine Cleaning:
• Use a soft cloth or sponge with mild dish soap or a pH-neutral cleaner. After showering or cooking, rinse residual soap or splatter and wipe panels dry to keep the finish clear.
• Steer clear of abrasive pads, gritty powders, and aggressive solvents that can dull or haze.
Tough Spots and Minor Damage:
• Grease And Splashes: For persistent grease, use a diluted degreaser or PVC-safe citrus solution
• Scuffs And Light Scratches: Many scuffs lift with microfiber polishing; patterned surfaces can be touched up with a color-matched repair crayon.
• Mold And Mildew: Typically surface-bound on soap scum. Clean with diluted vinegar or plastic-safe bathroom cleaner and improve room ventilation.
Long-Term Habits:
• Sunlight: In sunny rooms, specify UV-stable product and consider window films or blinds to cut daily UV.
• Heat: Keep kettles, toasters, and space heaters a safe distance. Use shields near cooktops.
• Seals: Inspect silicone once a year; cut out and re-seal any sections that have cracked or separated.
Shopping Checklist for First-Time Buyers
• Confirm Room Suitability: Wet-rated for shower use; UV-stable cap layers for sun-facing walls.
• Read The Specs: Check thickness, density, fire rating, VOC/IAQ credentials, and max service temperature.
• Order Samples: Compare color, gloss, and texture under your lighting morning to night.
• Inspect Construction: Check for clean edges, a tight tongue-and-groove, and panels that sit flat.
• Match Accessories: Verify corner pieces, end caps, and H-joins exist in the same finish.
• Verify Lead Times: Some finishes and trims have extended lead times - plan to avoid mixed batches.
• Review Warranty And Support: Confirm documented coverage for colorfastness and delamination plus responsive support.
• Compare Total Cost: Request a turnkey installed cost including trims, adhesives, prep, and waste factors.
Common Mistakes to Avoid
• Skipping acclimation, which can result in later gaps or buckling.
• Choosing solvent-based adhesives that may soften or stain PVC.
• Omitting expansion gaps at floor, ceiling, and perimeter edges.
• Inadequate sealing in shower zones, allowing moisture behind trims or into corners.
• Installing within the heat-clearance zone without shields or required offsets.
Final Thoughts
PVC Wall Panels for Home Renovation make a strong case when you want a clean, durable finish without the maintenance of grout or the weight of stone. Start by matching the panel type and finish to your room, verify the specs that matter (UV, fire rating, VOCs, and wet-area approval), and map out trims and sealant lines before you cut the first piece. Build a budget with realistic per-square-foot figures, then keep panels looking sharp with simple cleaning and an annual sealant check. With a bit of planning, you'll get a crisp, modern result that holds up beautifully in both wet and dry spaces.


